If you do not have Eclipse installed, you may want to
download the stand-alone version of Papyrus (102 MB.)
If you already have Eclipse installed, you are only required to
add Papyrus
to your configuration.
Initial Setup
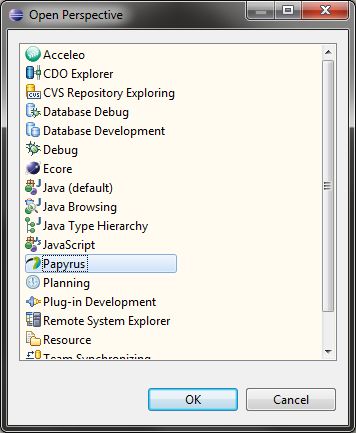
To begin using Papyrus, launch Eclipse (or stand-alone Papyrus) and navigate to
Window -> Open Perspective -> Other,
select Papyrus and press OK.
To create a new Project, navigate to
File -> New -> Papyrus Project. Enter your project name and,
if desired, change the default location. Advance to the next screen, check the UML box, and press Finish.
Use Case Diagrams
To create a new Use Case Diagram, right-click your newly-created model on the
Model Explorer and
select
New Diagram -> UML UseCase Diagram. Name your diagram and press OK.
A file called "model.di" will now be open and ready for editing under the
Model Explorer.
You may find elements relevant to you within the
Palette window. Use Cases, Actors, and Subject Area
are all contained within the
Nodes category and the arrows used to relate these elements are
contained within the
Links category.
You may add objects by selecting them on the
Palette and clicking anywhere on the model.di whitespace. To edit an object's attributes,
select the object and change the desired fields on the
Properties window. To create a relationship,
select an arrow, click the first actor, and release the mouse over the second actor.
Export Image
To be able to export images, you will need to install
this plugin first.
Note that the file you need to download in SourceForge, is located within a folder called
Image Export Plug In.
To export an image, navigate to
File -> Export.. -> Other -> Image of Current Diagram, select the desired Image Format, and press Finish.